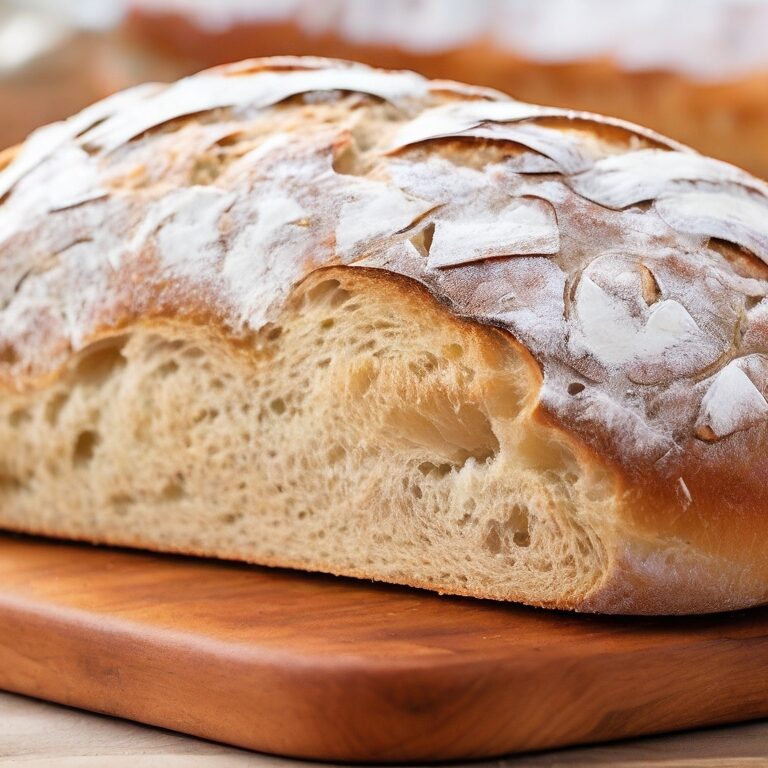

Imagine the aroma of a warm loaf of bread, straight from the oven, filling your kitchen with a sense of comfort and contentment. The anticipation of that crisp, golden crust and the soft, fluffy interior brings a touch of magic to the air. It’s a feeling that transports you to the rustic countryside of Italy, where every bite is a celebration of tradition and culinary craftsmanship.
Today, I invite you on a culinary journey to discover the joy of creating your very own Homemade Rustic Crusty Italian Bread. This recipe will not only fill your home with the irresistible aroma of freshly baked bread, but it will also transport you to the heart of Italy, where bread baking is an art form passed down through generations.
There’s something undeniably special about baking your own bread. It’s a testament to your dedication and love for the craft, and the rewards are unparalleled. Imagine the smiles of your loved ones as they bite into a slice of authentic Italian bread, perfectly crusty on the outside and tender on the inside. The satisfaction of knowing that you crafted this masterpiece with your own hands is immeasurable.
So, roll up your sleeves, grab your apron, and let’s embark on a journey of flour-dusted countertops and the aroma of freshly baked happiness. Whether you’re a seasoned baker or a curious novice, this Homemade Rustic Crusty Italian Bread recipe will become a staple in your kitchen, filling your home with the essence of Italy and the warmth of homemade bread.
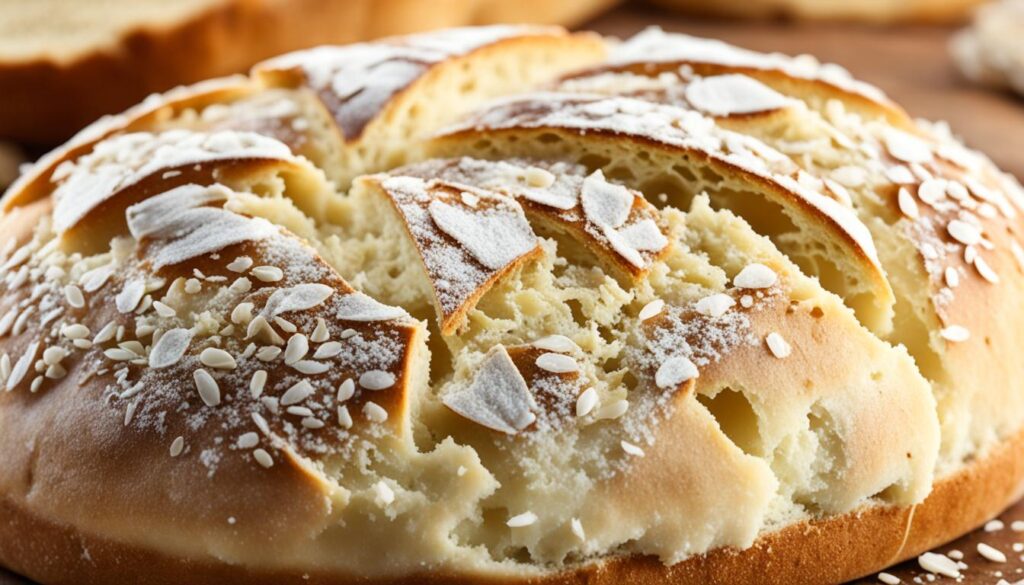
Table of Contents
Embracing the Simplicity of Traditional Italian Baking
Traditional Italian baking is a celebration of simplicity and minimalism. It’s about using basic tools and ingredients to create artisanal bread that embodies the rich flavors and textures of Italy. With just a bowl, a fork, and an oven, you can embark on a culinary journey that showcases the essence of Italian baking techniques.
The Joy of Artisan Bread with Minimal Tools
One of the remarkable aspects of Italian baking is that it doesn’t require fancy, specialized equipment. Instead, it embraces the beauty of simplicity, allowing you to focus on the fundamentals. A basic mixing bowl and a fork are sufficient for combining the ingredients and kneading the dough. By relying on your hands and intuition, you’ll experience the joy of creating artisan bread from scratch, using minimal tools.
Therapeutic Rewards of Homemade Bread
Baking your own bread not only allows you to savor the delicious flavors and aromas but also offers therapeutic benefits. The process of kneading dough can be a meditative experience, as you rhythmically work the ingredients together. The act of baking can bring a sense of calm and satisfaction, relieving stress and stimulating creativity. Plus, the aroma of freshly baked bread can create a comforting atmosphere, making your home even more inviting.
The Secret to Authentic Italian Crust: Tipo 00 Flour
When it comes to achieving an authentic Italian crust, there’s one ingredient that stands out above the rest – Tipo 00 flour. This finely ground Italian flour is renowned for its ability to create the perfect crust in pizza, pasta, and of course, bread.
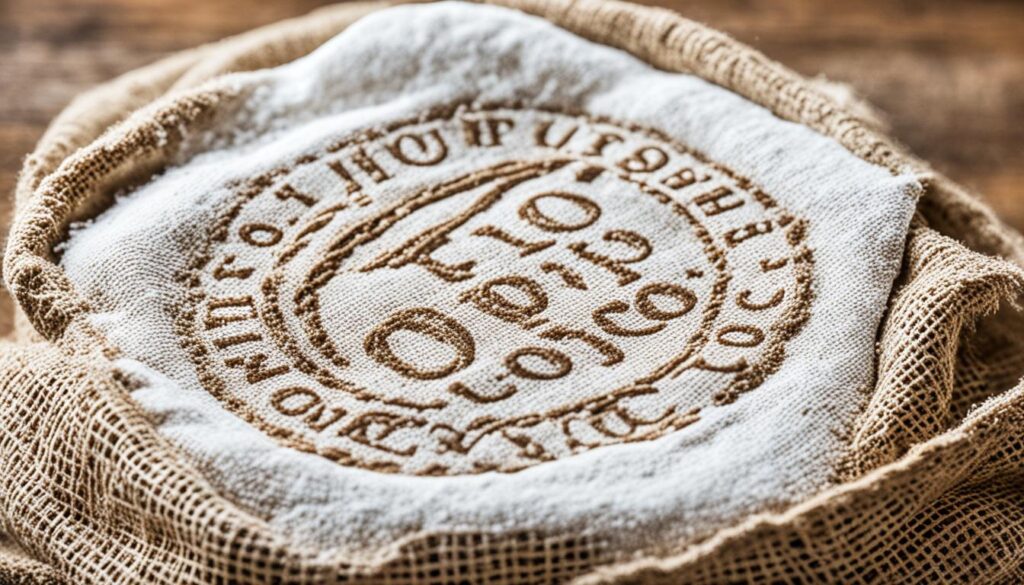
Tipo 00 flour is considered the gold standard in Italian baking ingredients. Its fine texture and low protein content result in a dough that is incredibly light, yet maintains the ideal level of chewiness. This unique combination of characteristics is what sets Italian bread apart from others.
Using Tipo 00 flour in your rustic Italian bread recipe ensures that you achieve the authentic taste and texture that make Italian bread so beloved. Its mild flavor allows the other ingredients in the bread to shine, while its delicate structure gives you the desired airy crumb and crispy crust.
Not only does Tipo 00 flour excel in producing outstanding results, but it is also a joy to work with. Its consistency makes it easy to handle and shape, allowing you to create beautiful loaves with ease.
So, when you’re ready to embark on your Italian bread-making journey, don’t forget to include Tipo 00 flour in your shopping list. It’s the secret ingredient that will take your bread to the next level and transport you to the streets of Italy with every bite.
Flavor Variations to Spice Up Your Italian Bread
Take your Italian bread to the next level with these flavor variations. Elevate your homemade loaf by infusing it with delicious combinations of fresh herbs, roasted garlic, and delectable toppings. Let’s explore some unique ways to add extra flavor and flair to your traditional Italian bread recipes.
Incorporating Fresh Herbs and Roasted Garlic
There’s nothing quite like the aroma of freshly baked bread infused with the natural flavors of herbs and roasted garlic. By incorporating these savory ingredients into your dough, you can create a bread that is bursting with aromatic goodness. Experiment with a variety of herbs such as rosemary, basil, thyme, or oregano, and roasted garlic for a mouthwatering blend of flavors. Whether you choose to finely chop the herbs or leave them in larger sprigs for an artistic touch, the result will be a bread that tantalizes the senses.
Here’s a simple recipe to get you started:
Herb and Roasted Garlic Italian Bread
Ingredients:
- 3 cups of all-purpose flour
- 2 teaspoons of instant yeast
- 1 teaspoon of salt
- 1 tablespoon of fresh herbs (e.g., rosemary, basil, thyme)
- 4 cloves of roasted garlic, minced
- 1 1/4 cups of warm water
Instructions:
- In a large mixing bowl, combine the flour, yeast, salt, fresh herbs, and roasted garlic.
- Add the warm water and mix until a rough dough forms.
- Knead the dough on a lightly floured surface for about 10 minutes, or until it becomes smooth and elastic.
- Place the dough in a greased bowl, cover it with a clean kitchen towel, and let it rise in a warm place for 1-2 hours, or until doubled in size.
- Punch down the dough to release any air bubbles and shape it into a loaf.
- Transfer the loaf to a baking sheet and let it rise for an additional 30 minutes.
- Preheat the oven to 450°F (230°C) and bake the bread for 25-30 minutes, or until golden brown and hollow-sounding when tapped on the bottom.
- Allow the bread to cool slightly before slicing and serving.
Experimenting with Toppings: Sea Salt and Sesame Seeds
Not only can you add flavor to your Italian bread through the dough itself, but you can also enhance its appeal by experimenting with different toppings. Sea salt and sesame seeds are popular choices that not only provide a delightful crunch but also elevate the visual presentation of your loaf. Sprinkle a generous amount of flaky sea salt or sesame seeds on top of your bread dough just before baking, and watch it transform into a work of art. These simple additions can make a big difference in both taste and appearance.
To inspire your creativity, here’s another recipe:
Sea Salt and Sesame Italian Bread
Ingredients:
- 3 cups of bread flour
- 2 teaspoons of instant yeast
- 1 teaspoon of salt
- 1 tablespoon of sesame seeds
- 1-2 tablespoons of flaky sea salt
- 1 1/4 cups of warm water
Instructions:
- In a large mixing bowl, combine the flour, yeast, salt, and sesame seeds.
- Add the warm water and mix until a rough dough forms.
- Knead the dough on a lightly floured surface for about 10 minutes, or until it becomes smooth and elastic.
- Place the dough in a greased bowl, cover it with a clean kitchen towel, and let it rise in a warm place for 1-2 hours, or until doubled in size.
- Punch down the dough to release any air bubbles and shape it into a loaf.
- Transfer the loaf to a baking sheet and let it rise for an additional 30 minutes.
- Preheat the oven to 450°F (230°C) and sprinkle the top of the loaf with flaky sea salt.
- Bake the bread for 25-30 minutes, or until golden brown and hollow-sounding when tapped on the bottom.
- Allow the bread to cool slightly before slicing and serving.
By incorporating fresh herbs, roasted garlic, and experimenting with toppings like sea salt and sesame seeds, you can transform a simple loaf of Italian bread into a flavorful and visually stunning masterpiece. Have fun exploring different flavor combinations and let your creativity shine in the kitchen!
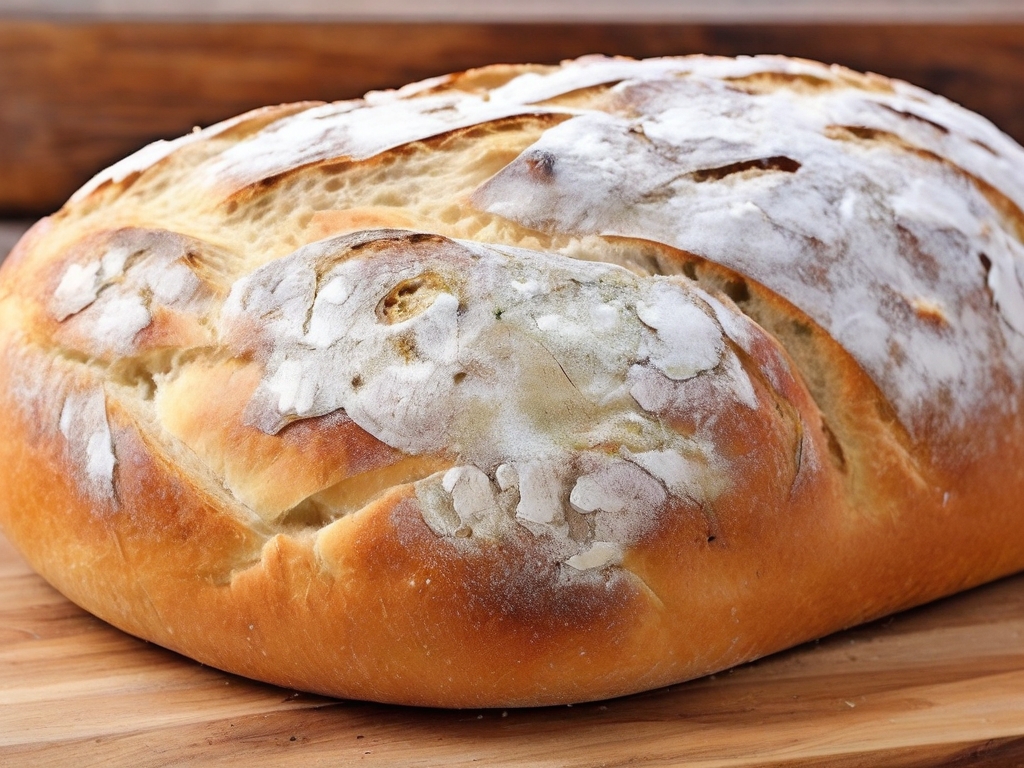
Tips for Achieving the Perfect Crusty Texture
Achieving a perfect crusty texture is the holy grail of baking Italian bread. Nothing beats the satisfaction of biting into a loaf with a crispy crust and a soft, tender crumb. To help you master the art of crusty bread, here are some valuable tips and techniques:
- Control the Oven Temperature: The ideal temperature for baking crusty bread is around 450°F (230°C). Preheat your oven thoroughly to ensure a hot and consistent baking environment.
- Use Steam During Baking: Create steam in your oven for the first 10-15 minutes of baking to promote a beautifully crisp crust. You can achieve this by placing a pan of water on the lower rack or using a spray bottle to mist water onto the bread and the oven walls.
- Invest in a Baking Stone or Dutch Oven: Using a baking stone or a preheated Dutch oven helps to mimic the intense heat of a real bread oven, resulting in a crustier bread. Place the dough directly on the baking stone or inside a preheated Dutch oven for best results.
- Slash the Dough: Before baking, score the loaf with shallow cuts using a sharp knife or a razor blade. This allows the steam to escape and helps the bread expand, contributing to a crusty texture.
- Let the Bread Cool Completely: Allow your bread to cool on a wire rack after baking. This prevents the steam from softening the crust and helps it maintain its crispy texture.
With these tips in your arsenal, you’ll be well on your way to achieving the perfect crusty texture every time you bake Italian bread. So go ahead, get your hands doughy and embrace the joy of crusty, homemade bread!
Why Making Bread at Home Beats Store-Bought Every Time
There’s something truly special about the taste of homemade bread that sets it apart from its store-bought counterparts. From the moment the enticing aroma fills your kitchen to the first bite of a warm, freshly baked slice, homemade bread offers a unique experience that simply cannot be replicated.
The Incomparable Taste of Freshly Baked Bread
One of the greatest advantages of homemade bread is the incomparable taste it delivers. Unlike mass-produced bread found in grocery stores, homemade bread is made with love and attention to detail. Each loaf is crafted with carefully selected ingredients, allowing you to customize the flavors to your liking. Whether you prefer a classic white loaf, a hearty whole wheat bread, or a flavorful herb-infused artisan bread, the possibilities are endless when you bake your own.
With homemade bread, you have the power to control the ingredients, ensuring that you’re using only the freshest and highest quality components. You can choose organic flour, incorporate wholesome grains and seeds, or even experiment with unique flavor combinations. Every bite becomes a symphony of taste, texture, and satisfaction.
Building Family Traditions with Baking
Baking bread at home goes beyond just satisfying your taste buds. It has the power to bring families together and create lasting traditions. The act of mixing ingredients, kneading the dough, and watching it rise can be a bonding experience for parents and children, siblings, or even close friends.
Family baking traditions are passed down from generation to generation, creating a sense of connection and continuity. As you bake bread together, stories are shared, laughter fills the air, and cherished memories are created. These moments become part of your family’s tapestry, creating a rich history that can be reflected upon and shared throughout the years.
Baking bread also provides an opportunity to teach valuable skills to younger family members. As they learn the art of breadmaking, they develop patience, creativity, and a sense of accomplishment. These skills, along with the joy of baking, are carried with them throughout their lives.
| Advantages of Homemade Bread | Store-Bought Bread |
|---|---|
| Freshly baked with superior taste | Mass-produced with preservatives |
| Customizable ingredients and flavors | Limited options and standard flavors |
| Bonding experience and family traditions | Lacks personal touch and connection |
| Opportunity to teach valuable skills | No involvement in the baking process |
Including Fresh Baked Italian Bread in Your Meals
Looking for ways to incorporate the mouthwatering flavors of freshly baked Italian bread into your meals? Look no further! Whether you’re serving it alongside your favorite Italian dishes or using it as a base for mouthwatering sandwiches or toasts, there are endless possibilities to enjoy this versatile bread.
For a classic Italian dining experience, pair your homemade bread with a hearty bowl of minestrone soup or a plate of spaghetti carbonara. The crusty texture and authentic flavors of the bread will complement the rich and comforting flavors of these traditional dishes.
If you’re seeking a quick and satisfying meal, use Italian bread to create delicious sandwiches or toasts. Spread some pesto on a slice of bread, layer it with fresh mozzarella, tomatoes, and basil for a tempting Caprese sandwich. Alternatively, make a crispy grilled cheese by adding your favorite cheese and a sprinkle of Italian herbs between two slices of bread.
But don’t limit yourself to just savory dishes! Italian bread can also be used as a base for delightful desserts. Whip up a classic Italian bread pudding by soaking slices of bread in a mixture of eggs, milk, sugar, and spices, then baking it until golden and crispy. Serve it warm with a drizzle of caramel sauce or a dusting of powdered sugar.
Homemade Rustic Crusty Italian Bread Recipe
Description
Follow this step-by-step guide to make your own Rustic Crusty Italian Bread. Mastering the art of baking bread from scratch is not as intimidating as it may seem. With a few simple ingredients and techniques, you can create a loaf that rivals those from your favorite Italian bakery. Let's dive in and uncover the secrets to success!
Ingredients
Crusty Italian Bread Ingredients
Instructions
Creating the Perfect Yeast Mixture
-
In a small bowl, combine 1 ½ cups (354 ml) warm water with 2 ¼ teaspoons (7 g) active dry yeast. Let it sit for about 5 minutes until the mixture becomes frothy. This indicates that the yeast is active and ready to go.
-
Add 2 teaspoons of sugar to the yeast mixture and stir until dissolved. The sugar acts as food for the yeast, helping it grow and ferment.
-
Let the yeast mixture rest for another 5 minutes, allowing it to further activate and develop flavor.
Kneading: The Path to a Perfect Crust
-
Transfer the yeast mixture to a large mixing bowl and gradually add 4 cups (500 g) bread flour, 2 teaspoons (10 g) salt, and any additional desired herbs or spices. Mix with a fork until the dough starts to come together.
-
Turn the dough onto a lightly floured surface and knead for 8-10 minutes, using the heel of your hands to push the dough away from you and then folding it back in on itself. Repeat this motion until the dough becomes smooth and elastic.
-
Remember, kneading is a therapeutic process, so enjoy the rhythm and the feel of the dough as it transforms under your hands.
Proofing: The Art of the Rise
-
Shape the kneaded dough into a ball and place it in a greased bowl. Cover the bowl with a clean kitchen towel or plastic wrap.
-
Allow the dough to rise in a warm, draft-free area for about 1-2 hours until it doubles in size.
-
Once the dough has proofed, it's ready to be baked into a delicious Rustic Crusty Italian Bread.
Ready To Be Baked
-
Preheat the oven to 450°F (230°C) and bake the bread for 25-30 minutes, or until golden brown and hollow-sounding when tapped on the bottom.
-
Allow the bread to cool slightly before slicing and serving.
Note
-
Yeast is a fundamental ingredient in bread baking as it provides the necessary rise and helps develop flavor. To create the perfect yeast mixture.
-
Kneading the dough is essential for developing gluten, which gives bread its structure and elasticity. The key to effective kneading is.
- The proofing time may vary depending on temperature and humidity. Keep an eye on the dough and look for it to increase in volume.